

Wallpaper is one of those things that looked beautiful on the Internet but I was pretty sure I’d never try it. First of all, because I had seen those videos of people putting it up and having it just continually rip or fall or go crooked or whatever other thing that happened to go wrong — and it also felt so permanent. If removing wallpaper is terrible, how could I ever make the commitment to install it?!
But I fell in love with a beautiful roll of wallpaper and I decided one night in a moment of courage to order it, thinking I’d do one wall of our guest bathroom. If I hated it or messed it up, well, it was just the one wall I’d be dealing with.
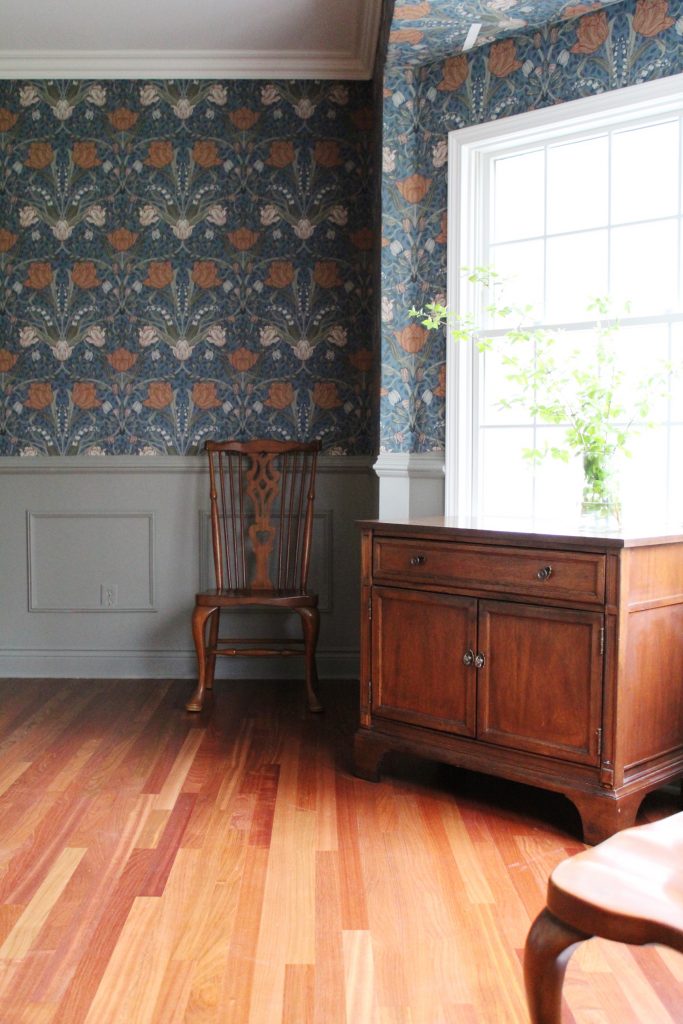
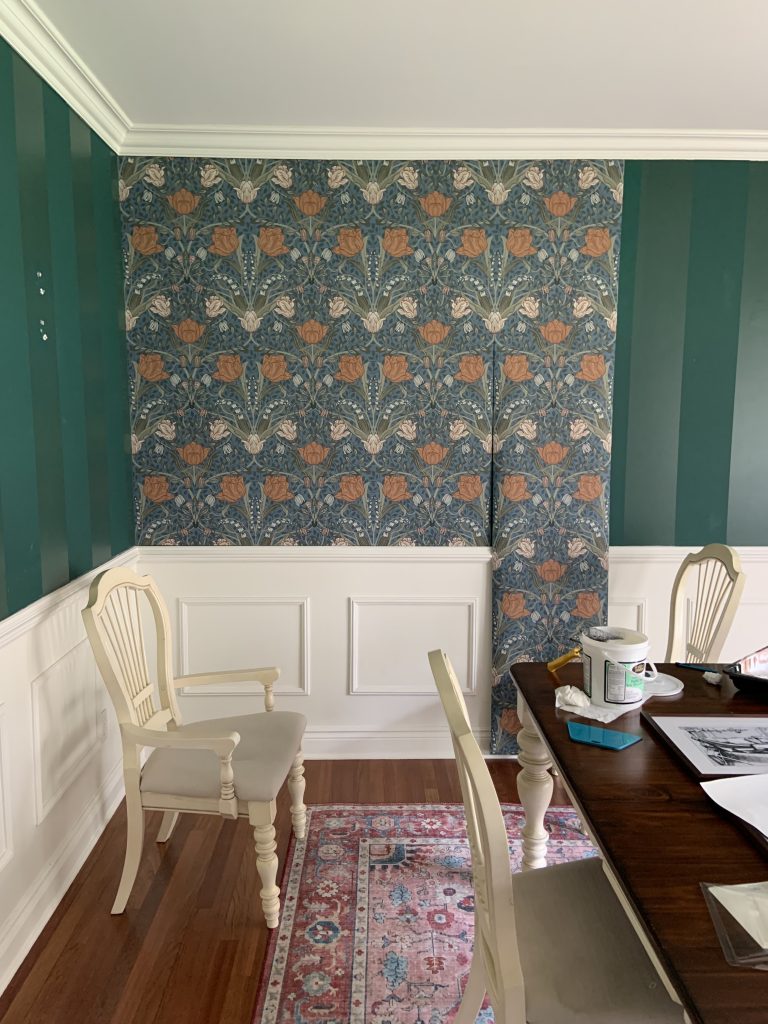
When it arrived, I just so happened to unpack it in my dining room and couldn’t stop thinking about how beautiful it would look in there. Without really thinking, I grabbed my roller, put the glue on the wall, and hung my first panel.
And honestly? It was surprisingly easy. The paper didn’t rip, it hung straight, it cut evenly, I didn’t even need two people. So then I ordered a bunch more rolls and got ready to do the entire dining room. It took probably 5 nights of going in after my kids’ bedtime and working on it (which, I actually enjoyed).
So. From someone who went from never ever touching wallpaper to doing the entire dining room with real paper and paste, here’s what you need to know:
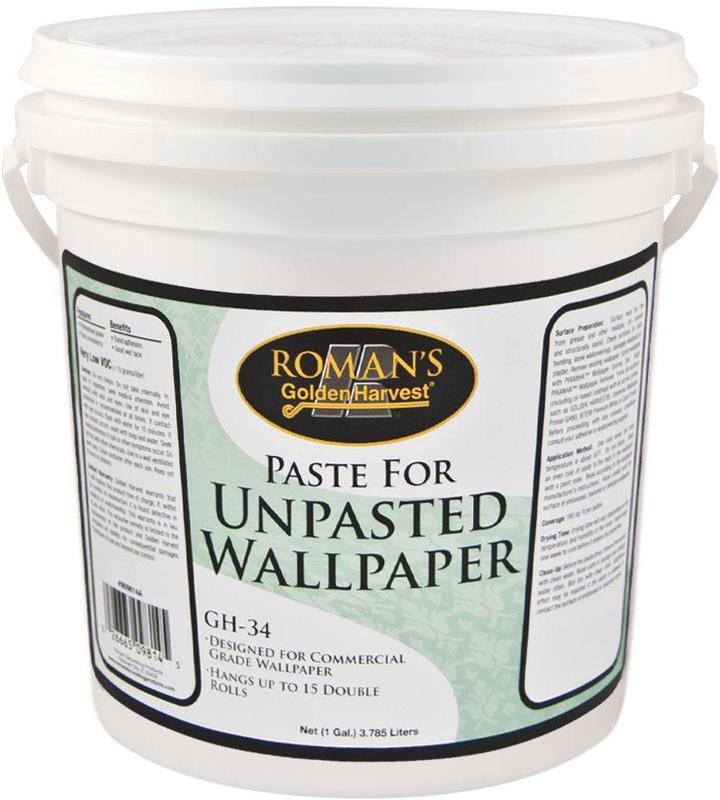
1. Get the real paper and paste.
Of course, as we discussed before, I have never tried any of the other kinds, so take that with a grain of salt. BUT, I know that there were several qualities of the real paper and paste that I simply could not have done well without. The idea of peel and stick or pre-pasted wallpaper both seem like they’re saving you a step at first, but, I actually think they would be harder (at least for me).
This is why: if you have no experience with wallpaper, having the maximum level of mistake-forgiveness is key. If you invest in the real, original, unpasted wall paper, it’s very thick, and it won’t rip or get soggy as you’re getting it up there on the wall and finding exactly the right position –— it actually let me slide it around on the wall if I wanted to tug it, but it also would hold firm when I needed, like when I was wrapping it around the edges of a corner or a ceiling for example. If I messed up, I could remove the entire panel easily, add more glue, and put it back up.
Which of course, I did, multiple times, and I didn’t ruin the wallpaper doing that. I was SO glad the paper was so forgiving. Also, this particular kind of paper is known as “strippable,” meaning, if we ever did want to remove it, you just peel it off and each panel comes off in one clean piece.
I think a good paste is important for this, too. You’ll also need a smoother and a sharp box cutter. Here are the materials I used:


For each panel, I took a small old paint roller, rolled a generous amount of glue right on to the wall, placed the wallpaper on the wall, lined it up, and then smoothed it into the corners and edges to create a crease so that I could cut it with your boxcutter. Any extra glue coming out the sides wipes off with a wet paper towel. And voila, one panel done. On the main walls, after I had some practice, each panel took me 2-5 minutes.

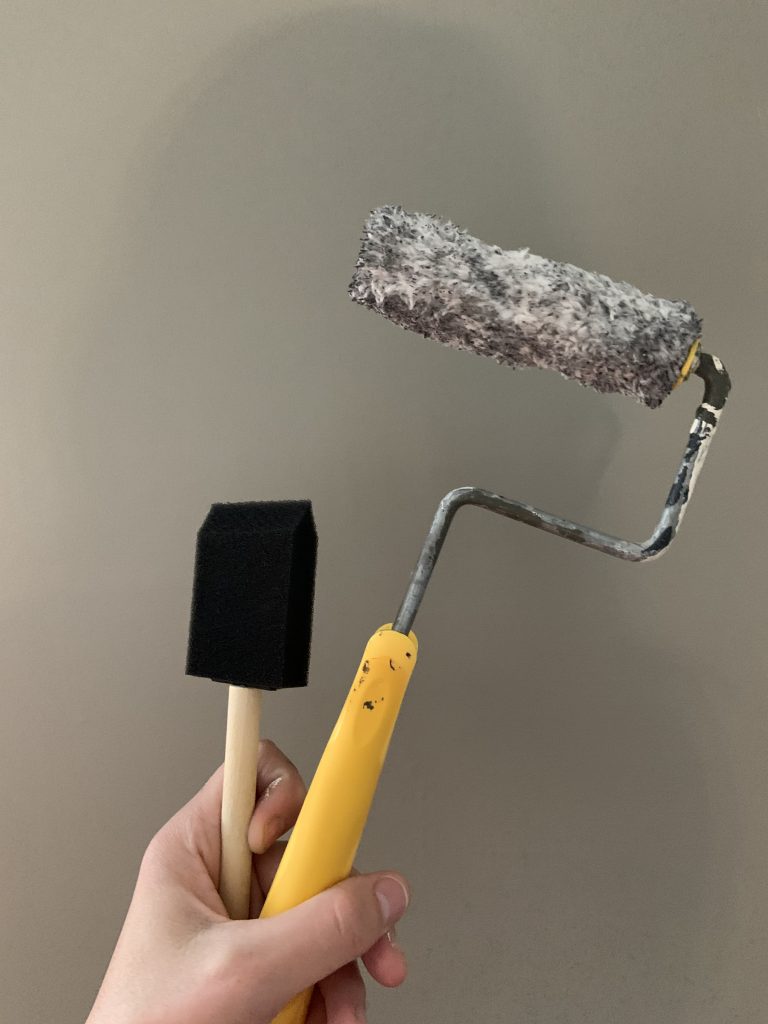
I used the small sponge brush here and there to patch spots I’d missed with the roller or to get in a small spot the roller couldn’t reach. It was nice to have on hand, but I’m definitely glad I had the roller for the most part.
2. Mind your repeating pattern.
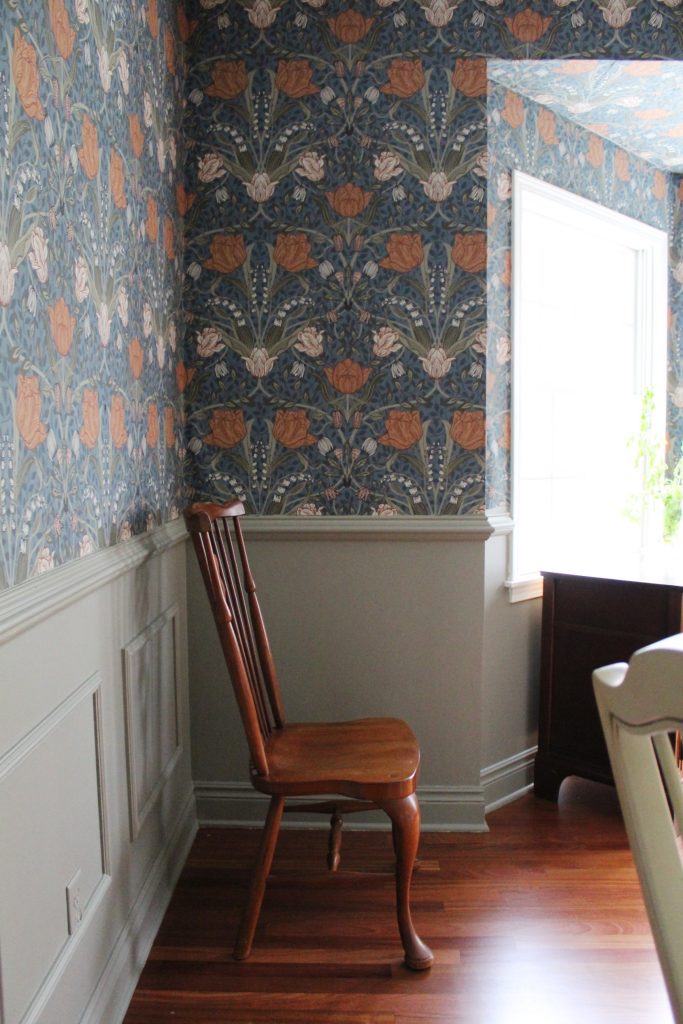
I didn’t even look at the repeating pattern before I ordered because I thought I was doing a small space, ordered on a whim, and honestly didn’t even know it could be relevant. I LOVE this room, and I LOVE this wallpaper, and I’m so glad that it’s currently installed there, but I’m not sure I would have chosen this pattern if I had thought through that because I wasted a ton of wallpaper.
It has a 20.5″ repeating pattern, which lined up exactly wrong for my project. The portion that I needed at the very top of the wall was repeated just barely at the very bottom of the wall, meaning I had to remove almost 18″ of wallpaper before I had the section I needed at the top of the wall again – for every. single, panel. all the way around the room. I have a gigantic pile of scraps of the exact same unneeded 18″ in my basement right now.

Is it a dealbreaker? No, just be prepared, and measure your space, because a smaller repeating pattern (or one that lines up with your surface area) may be less expensive.
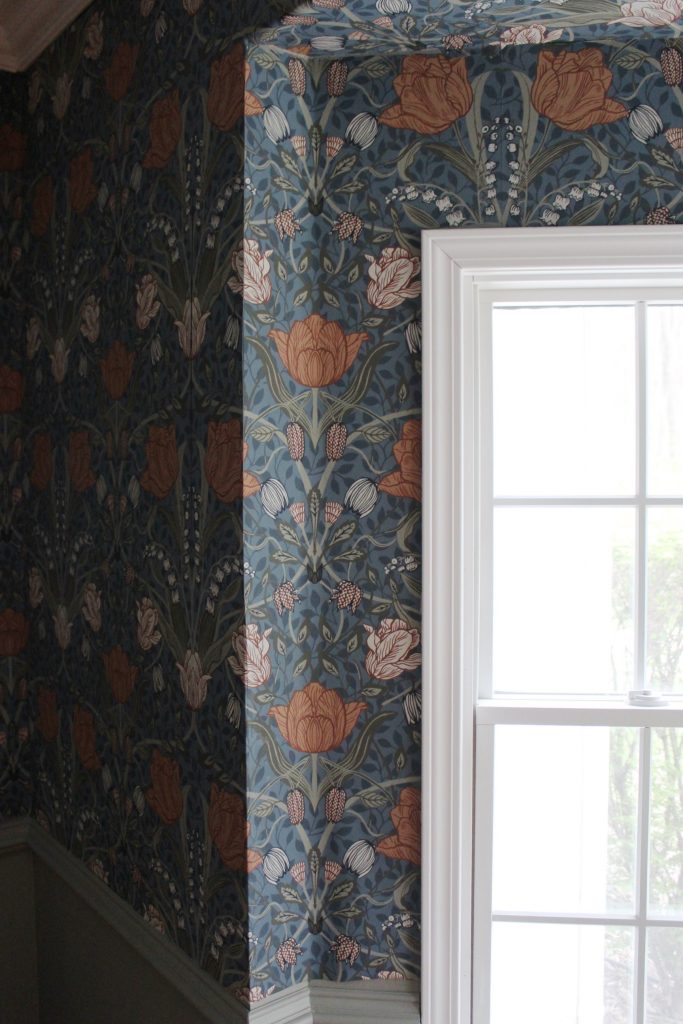
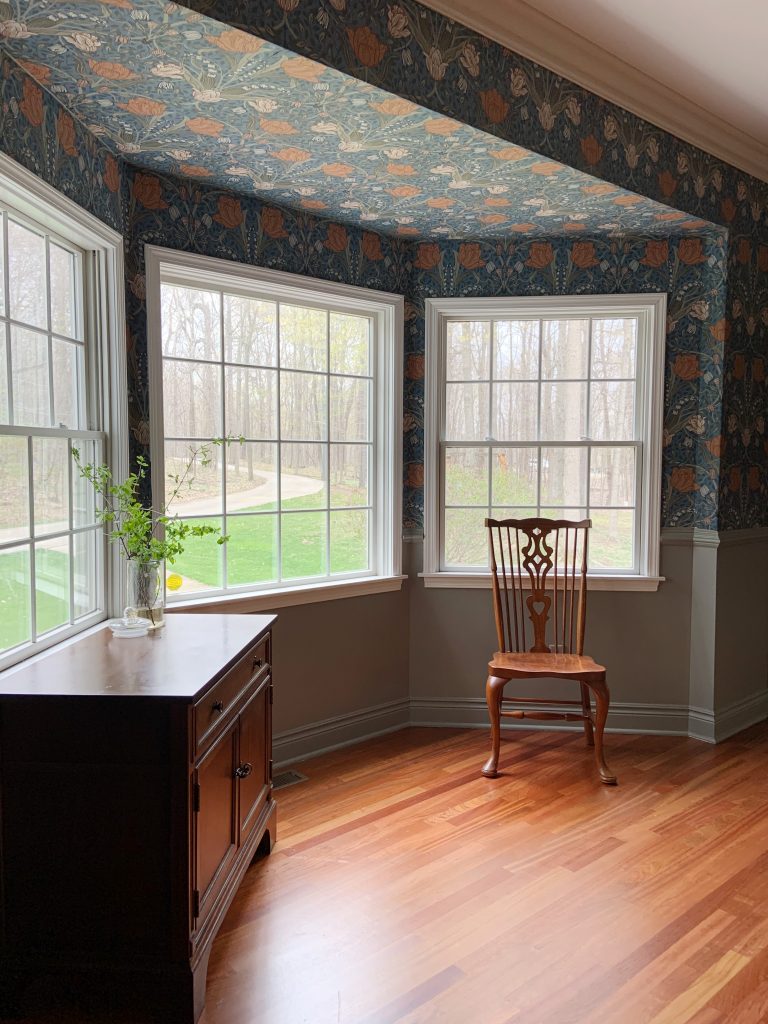
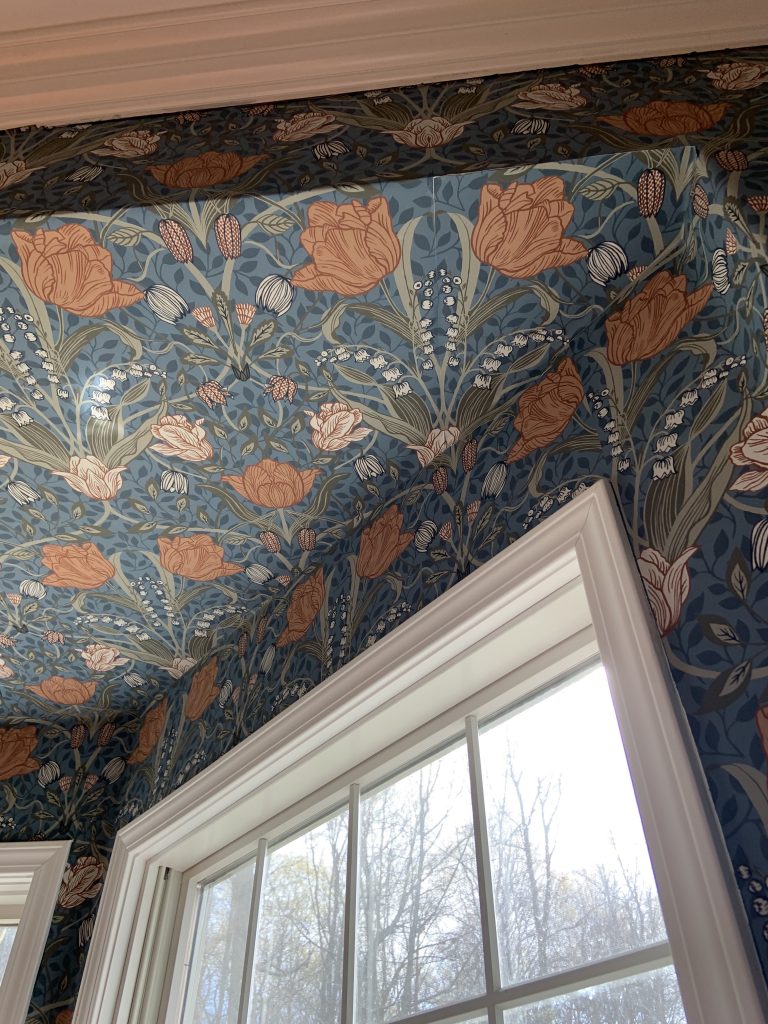
3. If you’re doing nooks, crannies, or ceilings, have a plan. But definitely do them.
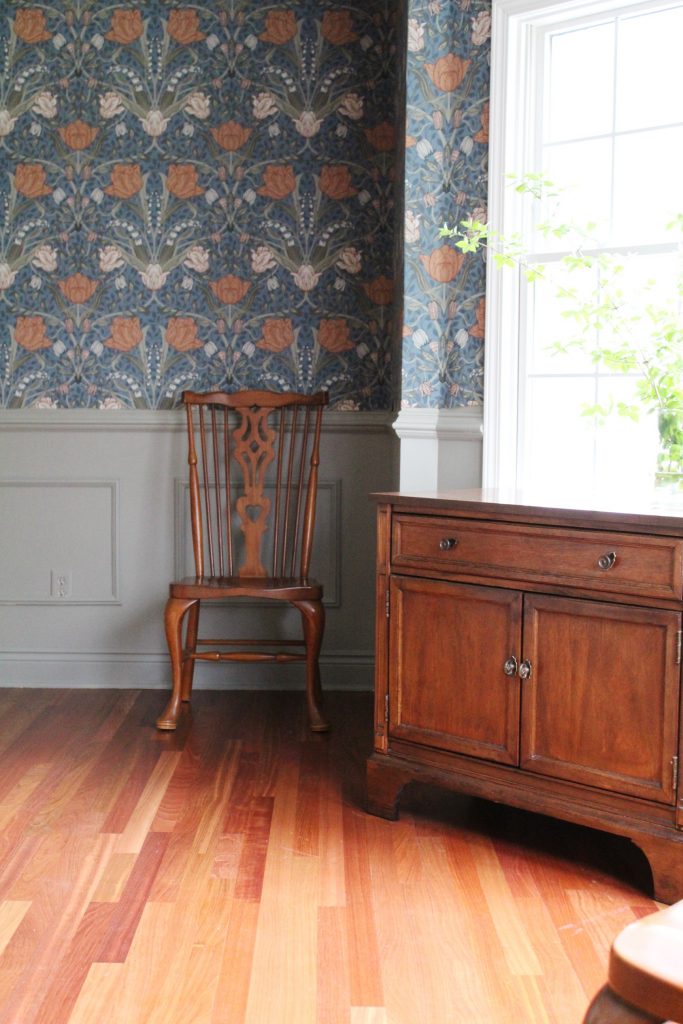
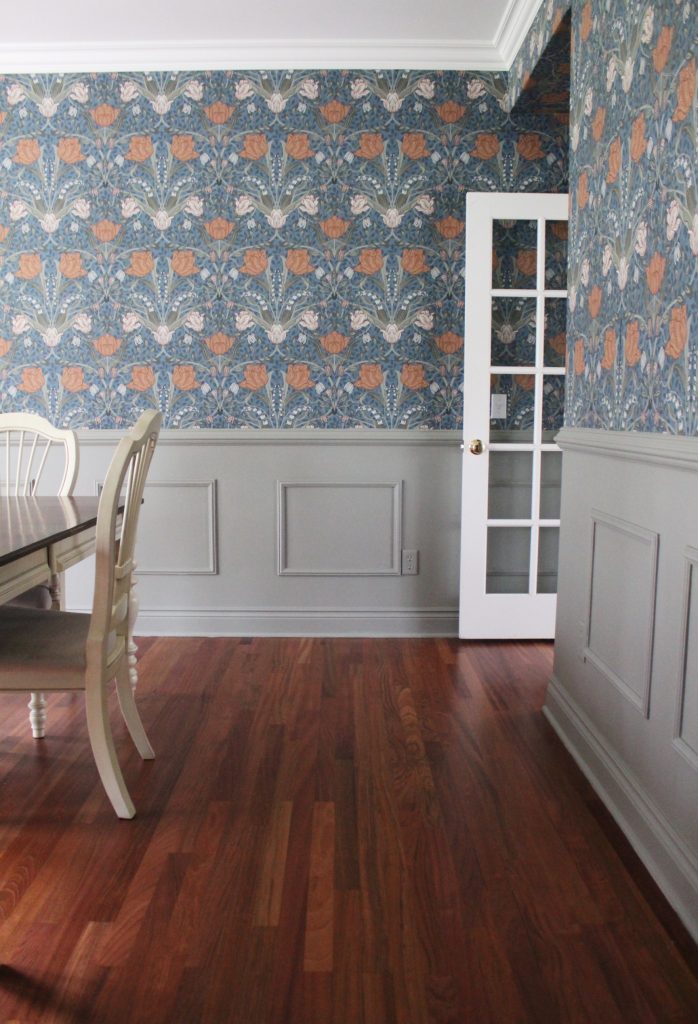
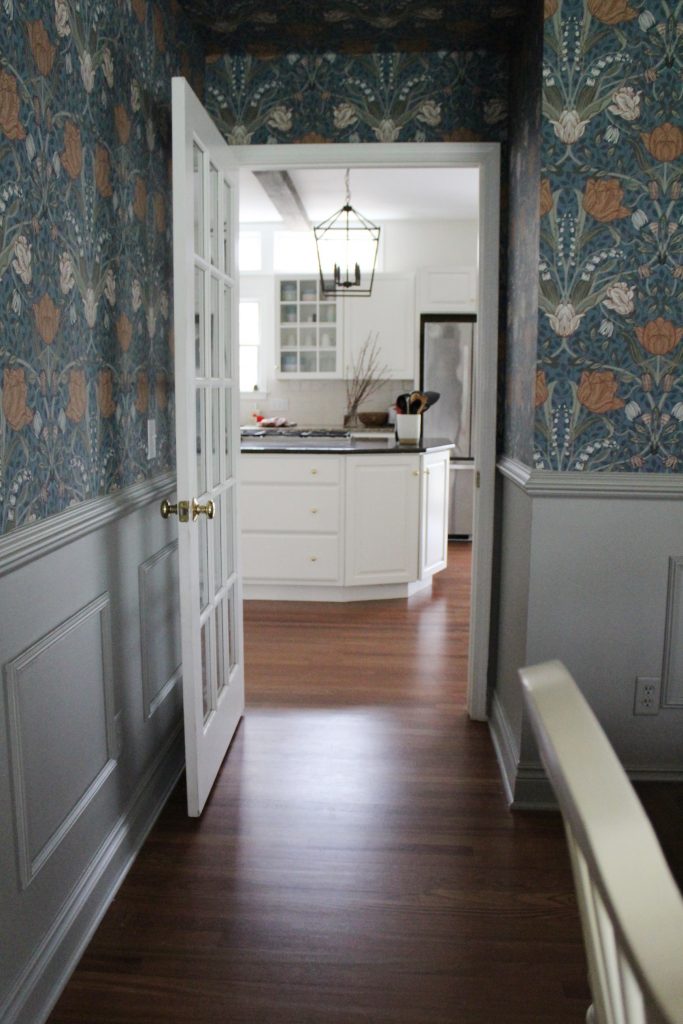
The walls in the dining room are beautiful, but the nooks and crannies all around the bay window really shine. That, and the soffits. They took 10 times longer than the wall, but it’s so worth it.
I did the soffit over the doorway into the dining room first and I had no plan. I just glued the wall, glued the ceiling, stuck my paper up there, and was confused and frustrated when it didn’t fold in 20 directions at once. That is not the method I would advise. It took FOREVER to figure it out with wet paper already on the wall and while it looks fine now, it was quite the terrible process.
After going through that, for the bay window I looked at the space first and figured out where I wanted my eye to perceive that the pattern is flowing. I knew I wanted the paper to appear to flow down the room — from ceiling to floor — but also, it needed to appear to repeat evenly from left to right.
So I decided to use one panel that folded from the ceiling into the soffit ceiling, and then cut it at the top of the wall. It was a “weak spot” where it didn’t bother my eye that the pattern flowed smoothly into the next section. Then, regardless of what spot was called for next on the pattern from there, I jumped ship and just repeated the same section from left to right to mirror the paper on the outside of the bay, which kept the pattern looking even across the room.
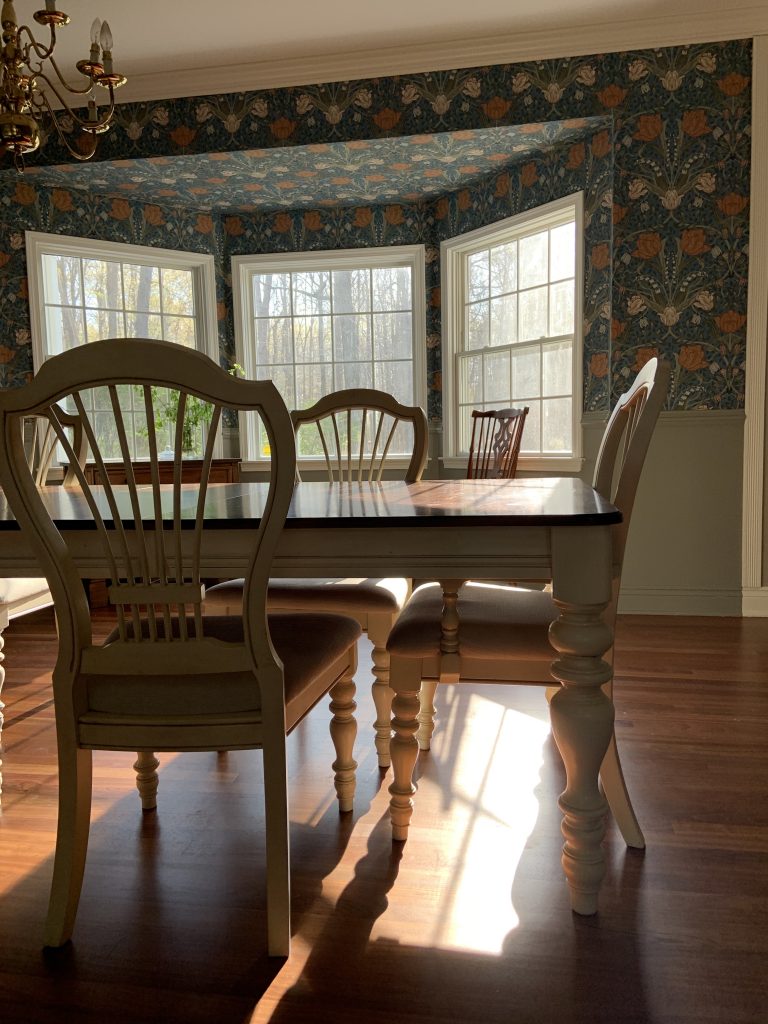
It makes it look like I really know how to install wallpaper and always get it to line up right, but in reality, I found a spot where you wouldn’t notice that the pattern breaks, and broke it, and focused on repeating evenly where you WOULD notice. You really can’t tell in that crease, it looks fine and natural.
I actually did not research how the pros do this, so, if you’re reading this and you’ve actually installed wallpaper before you’re probably thinking either “DUH obviously” or “this method is also terrible” but you know what, it worked for me and required zero math or pre-cutting (I just did it all on the ceiling with my exacto knife!) so I’ll take it, amateur hour and all.
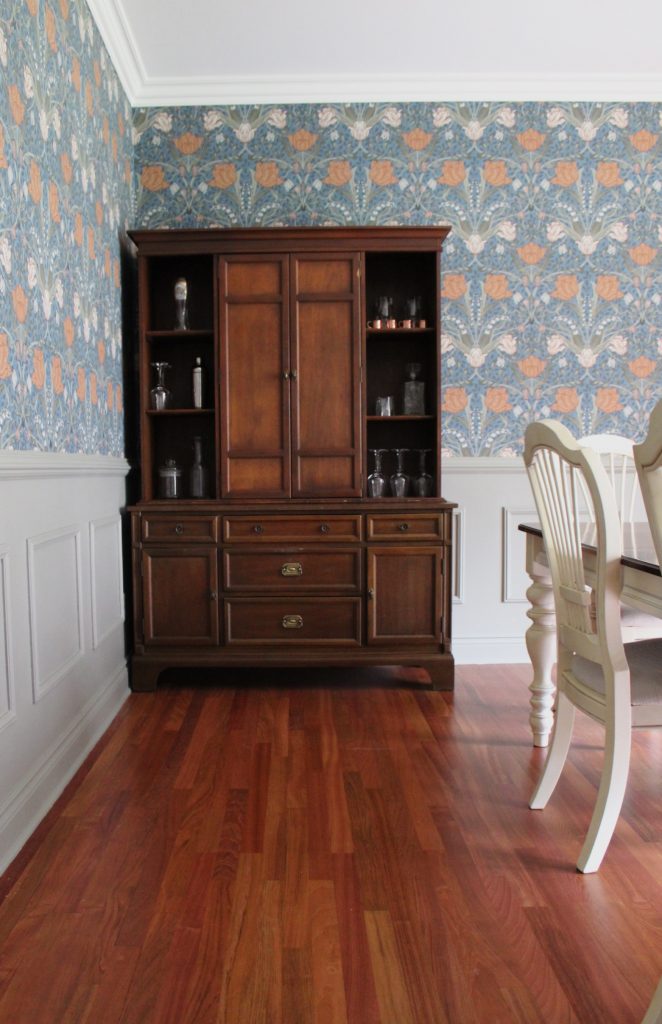
Next up, I probably need to get some art in here, and I will eventually, but right now I’m just enjoying the color from the wallpaper and I don’t want to mess with it! I painted the lower half of the wall in “Arctic Shadows” by Benjamin Moore, which is a color very similar to the leaves in the flowers. I thought about approximately ten million colors on the bottom half, but this one just finally felt right. I knew I didn’t want blue, even though it was the backdrop of the paper, because I didn’t want it to feel like a “blue room” — just a dining room that happened to have blue in it.

I’m working on about a million other ideas for using wallpaper in my house now, because I have some glue leftover and I have to use it, right? It’s like one of those bagel and cream cheese situations. If you have extra cream cheese, you definitely need more bagels. Or vice versa. (Or am I the only person who thinks of quantities in this way?) Regardless, I’m very sure there is more wallpaper to come. In the meantime, you’ll find me in here every chance I get.
Dreaming up a makeover in your own home? We can help! Request Halley to help with your project and learn more about our design services >>
-
 1×1 Video Consultation$100.00
 -
 The Guided Design$300.00
 -
 The Blueprint$125.00

![]()
