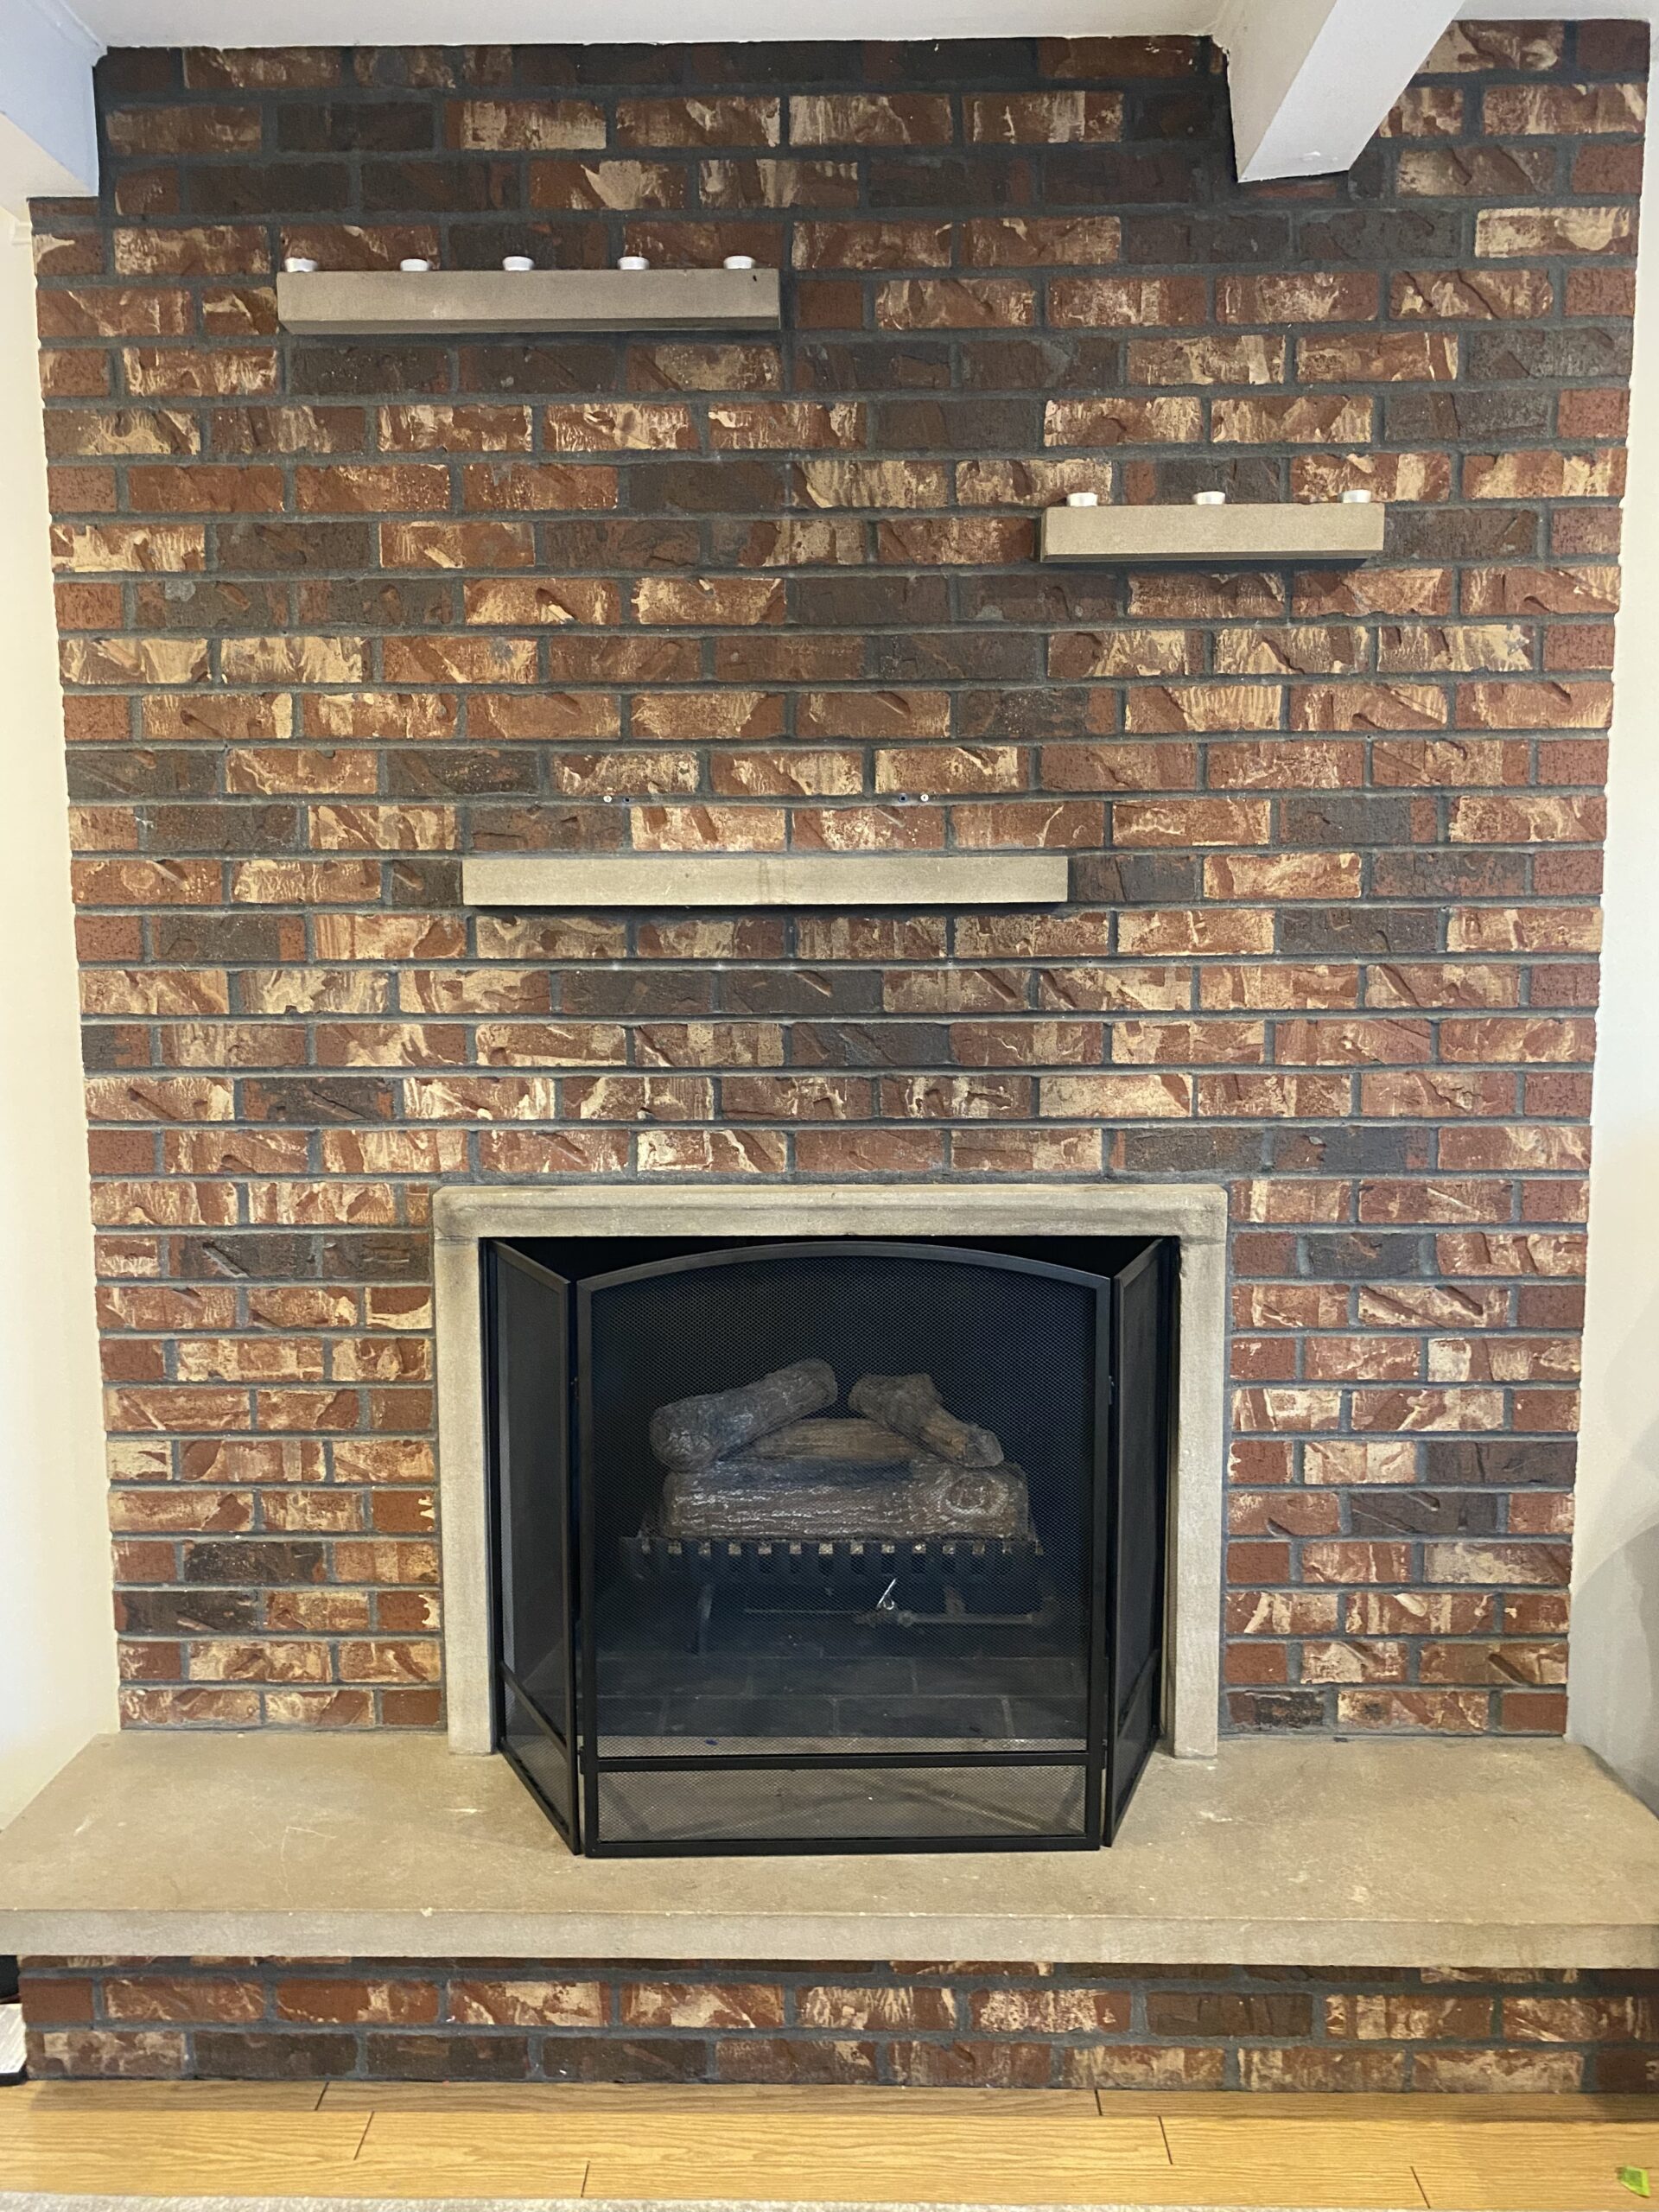
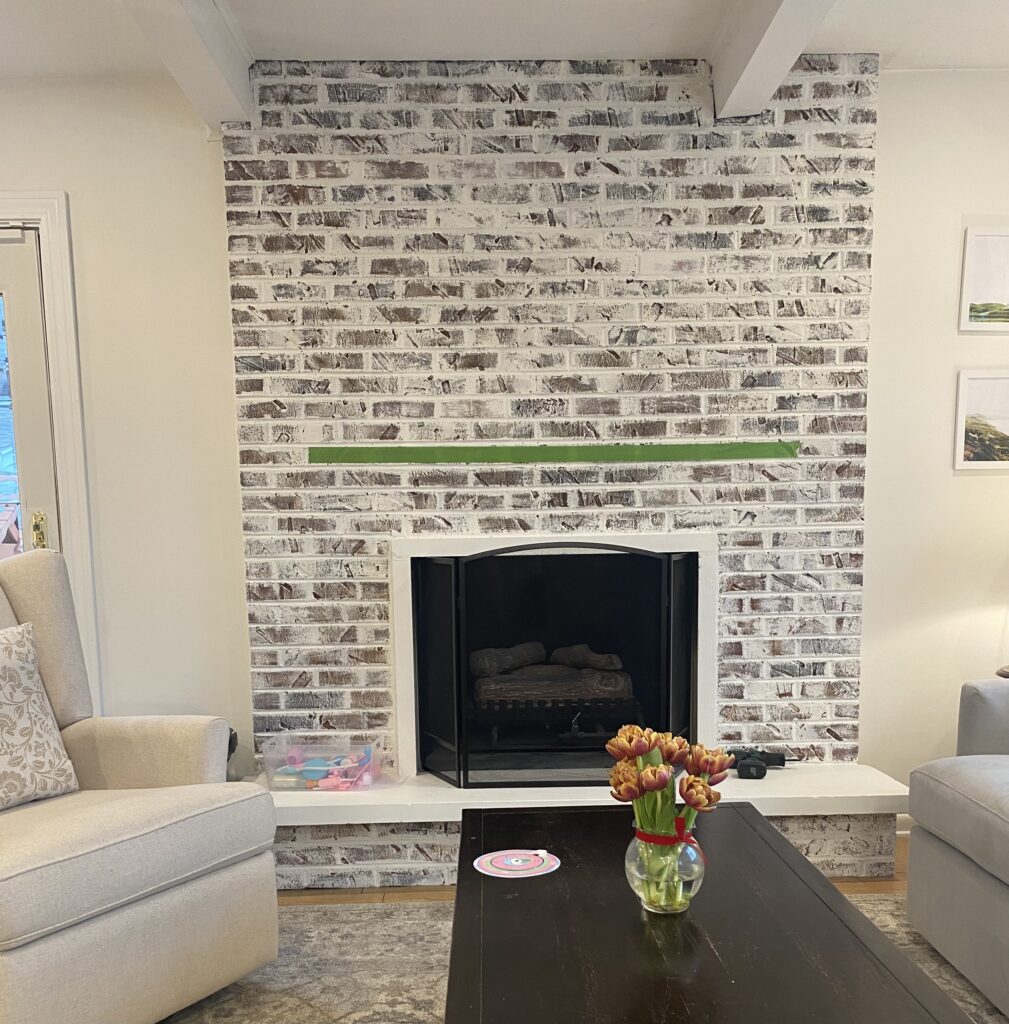
Fireplaces can be a captivating focal point in any home, but outdated designs can sometimes detract from the overall aesthetic. In our case, we had a dark brown brick 1960’s fireplace with three asymmetrical ledges that desperately needed a fresh and contemporary touch.
I set out thinking that this was going to be a difficult project, but it ended up not being as challenging as I originally thought. Now it’s one of my favorite transformations to date!
Let’s take a look at the before to see where it all started…
Before…
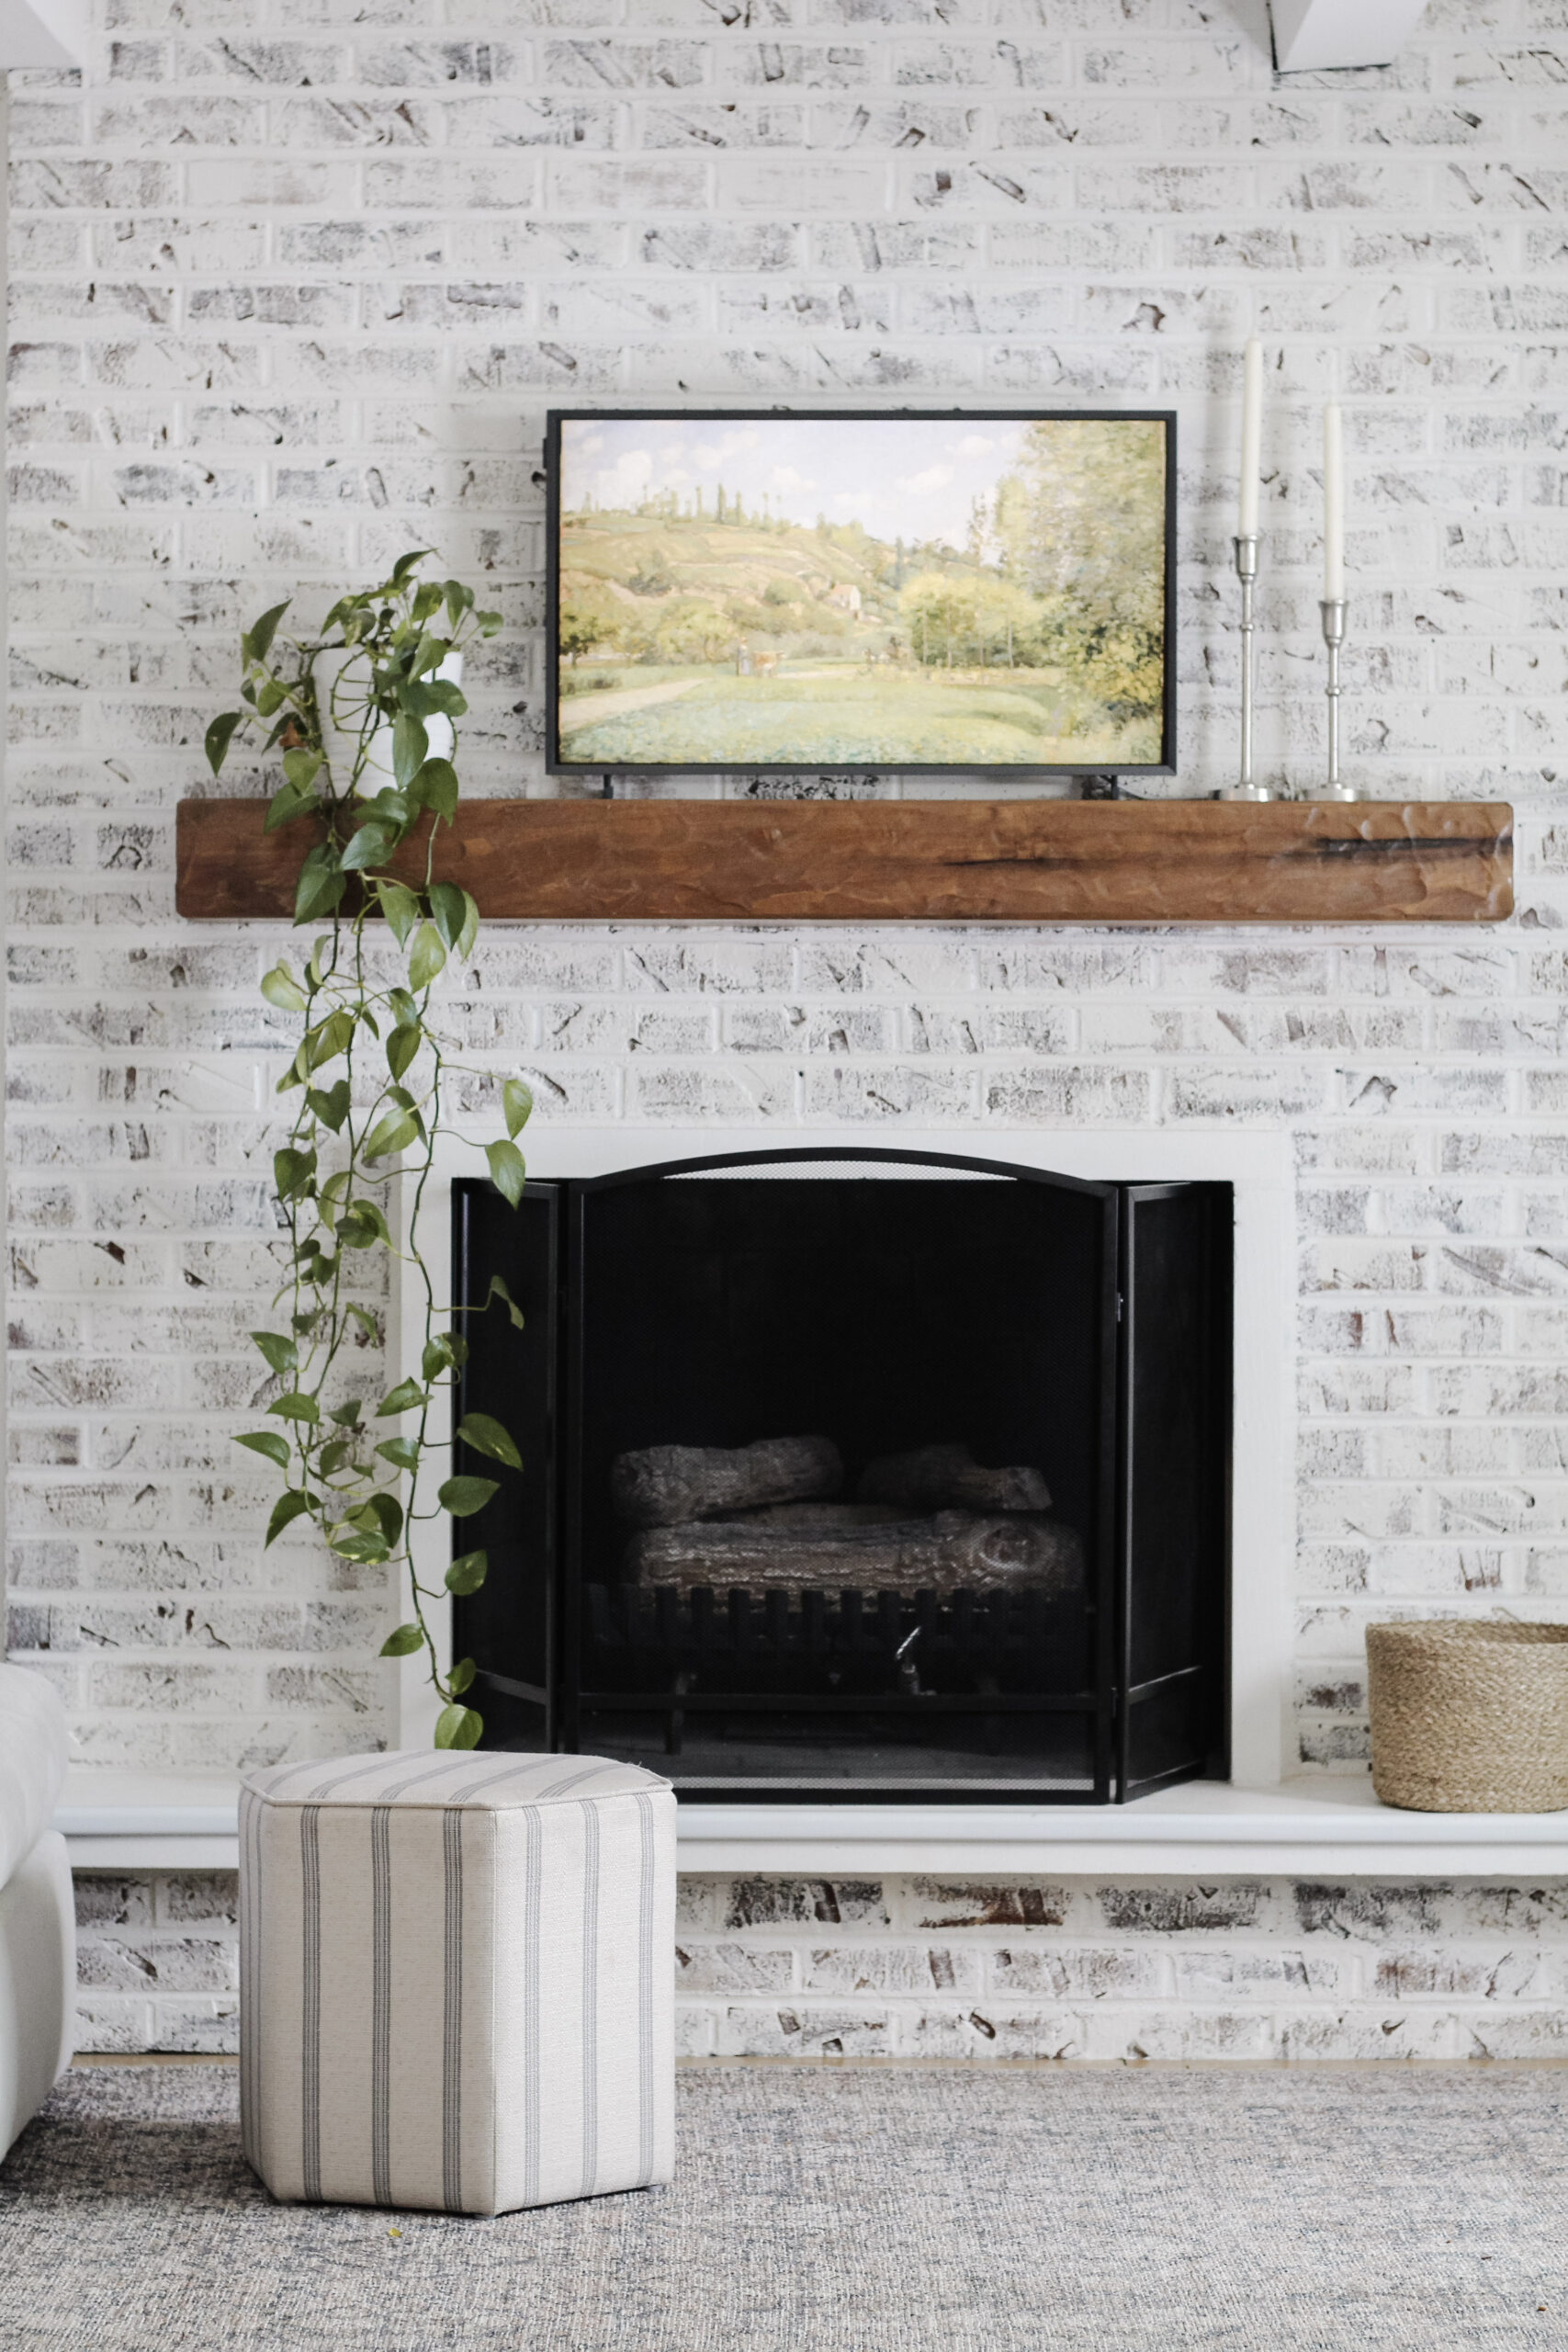
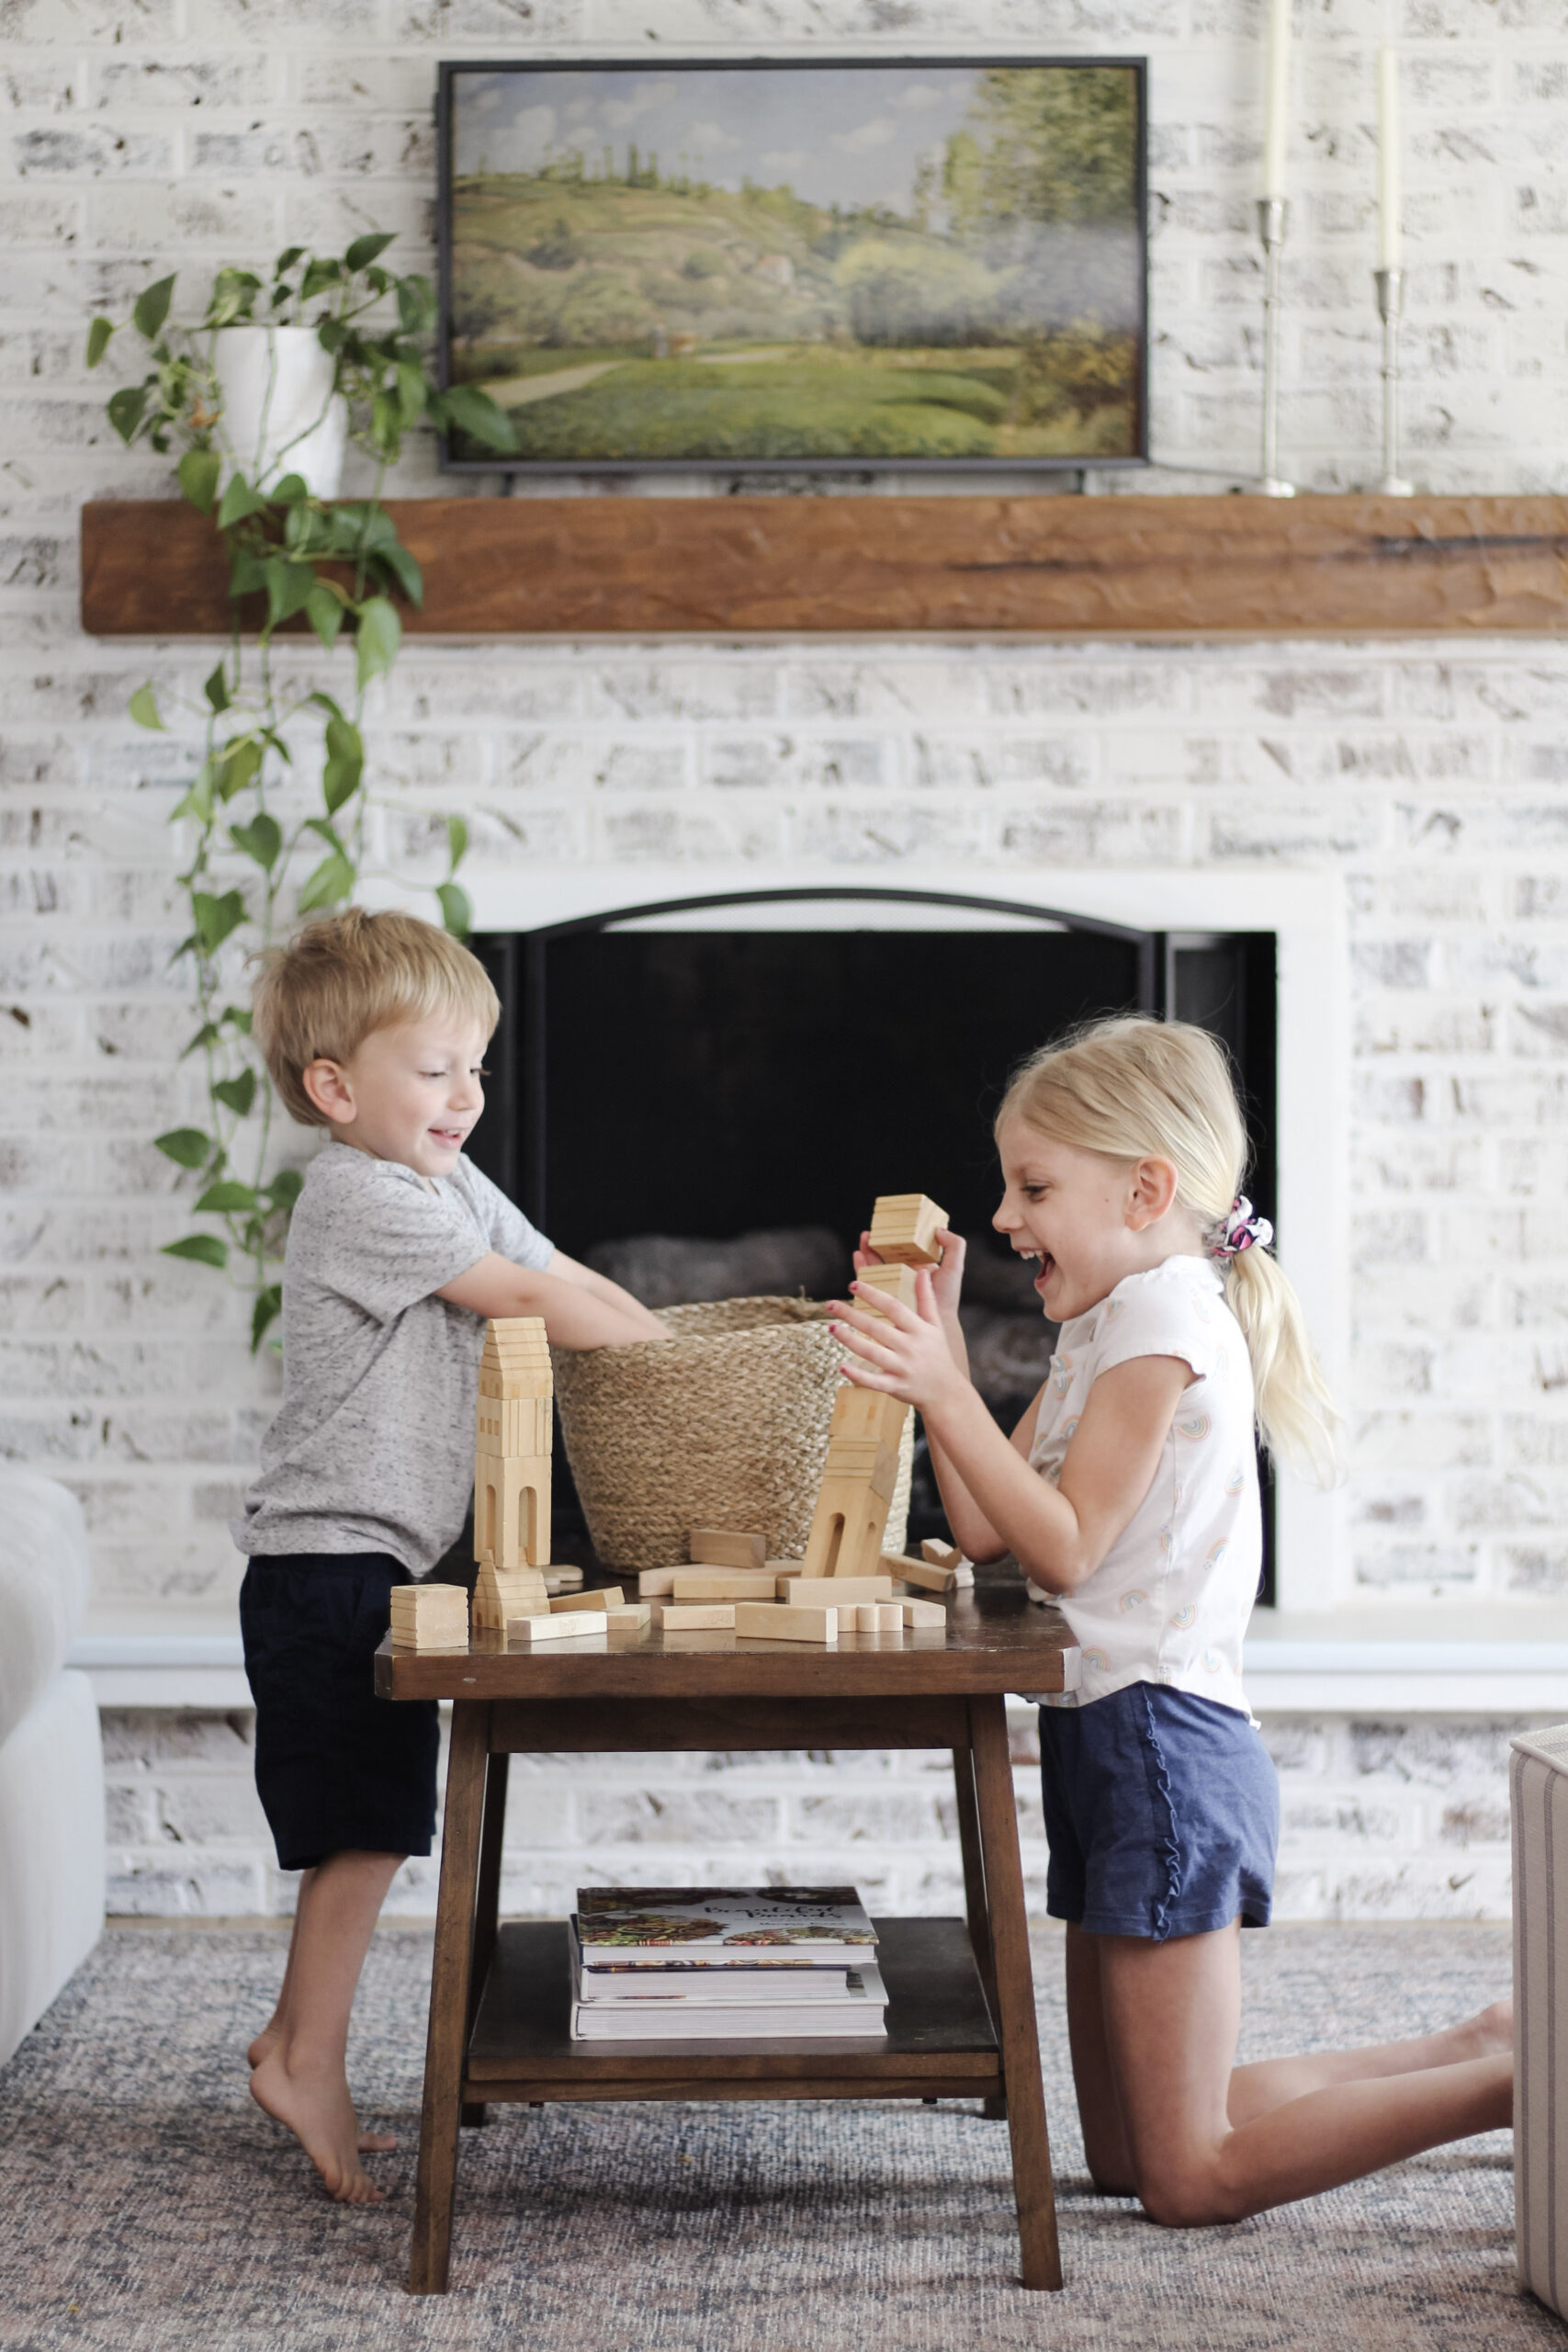
After…
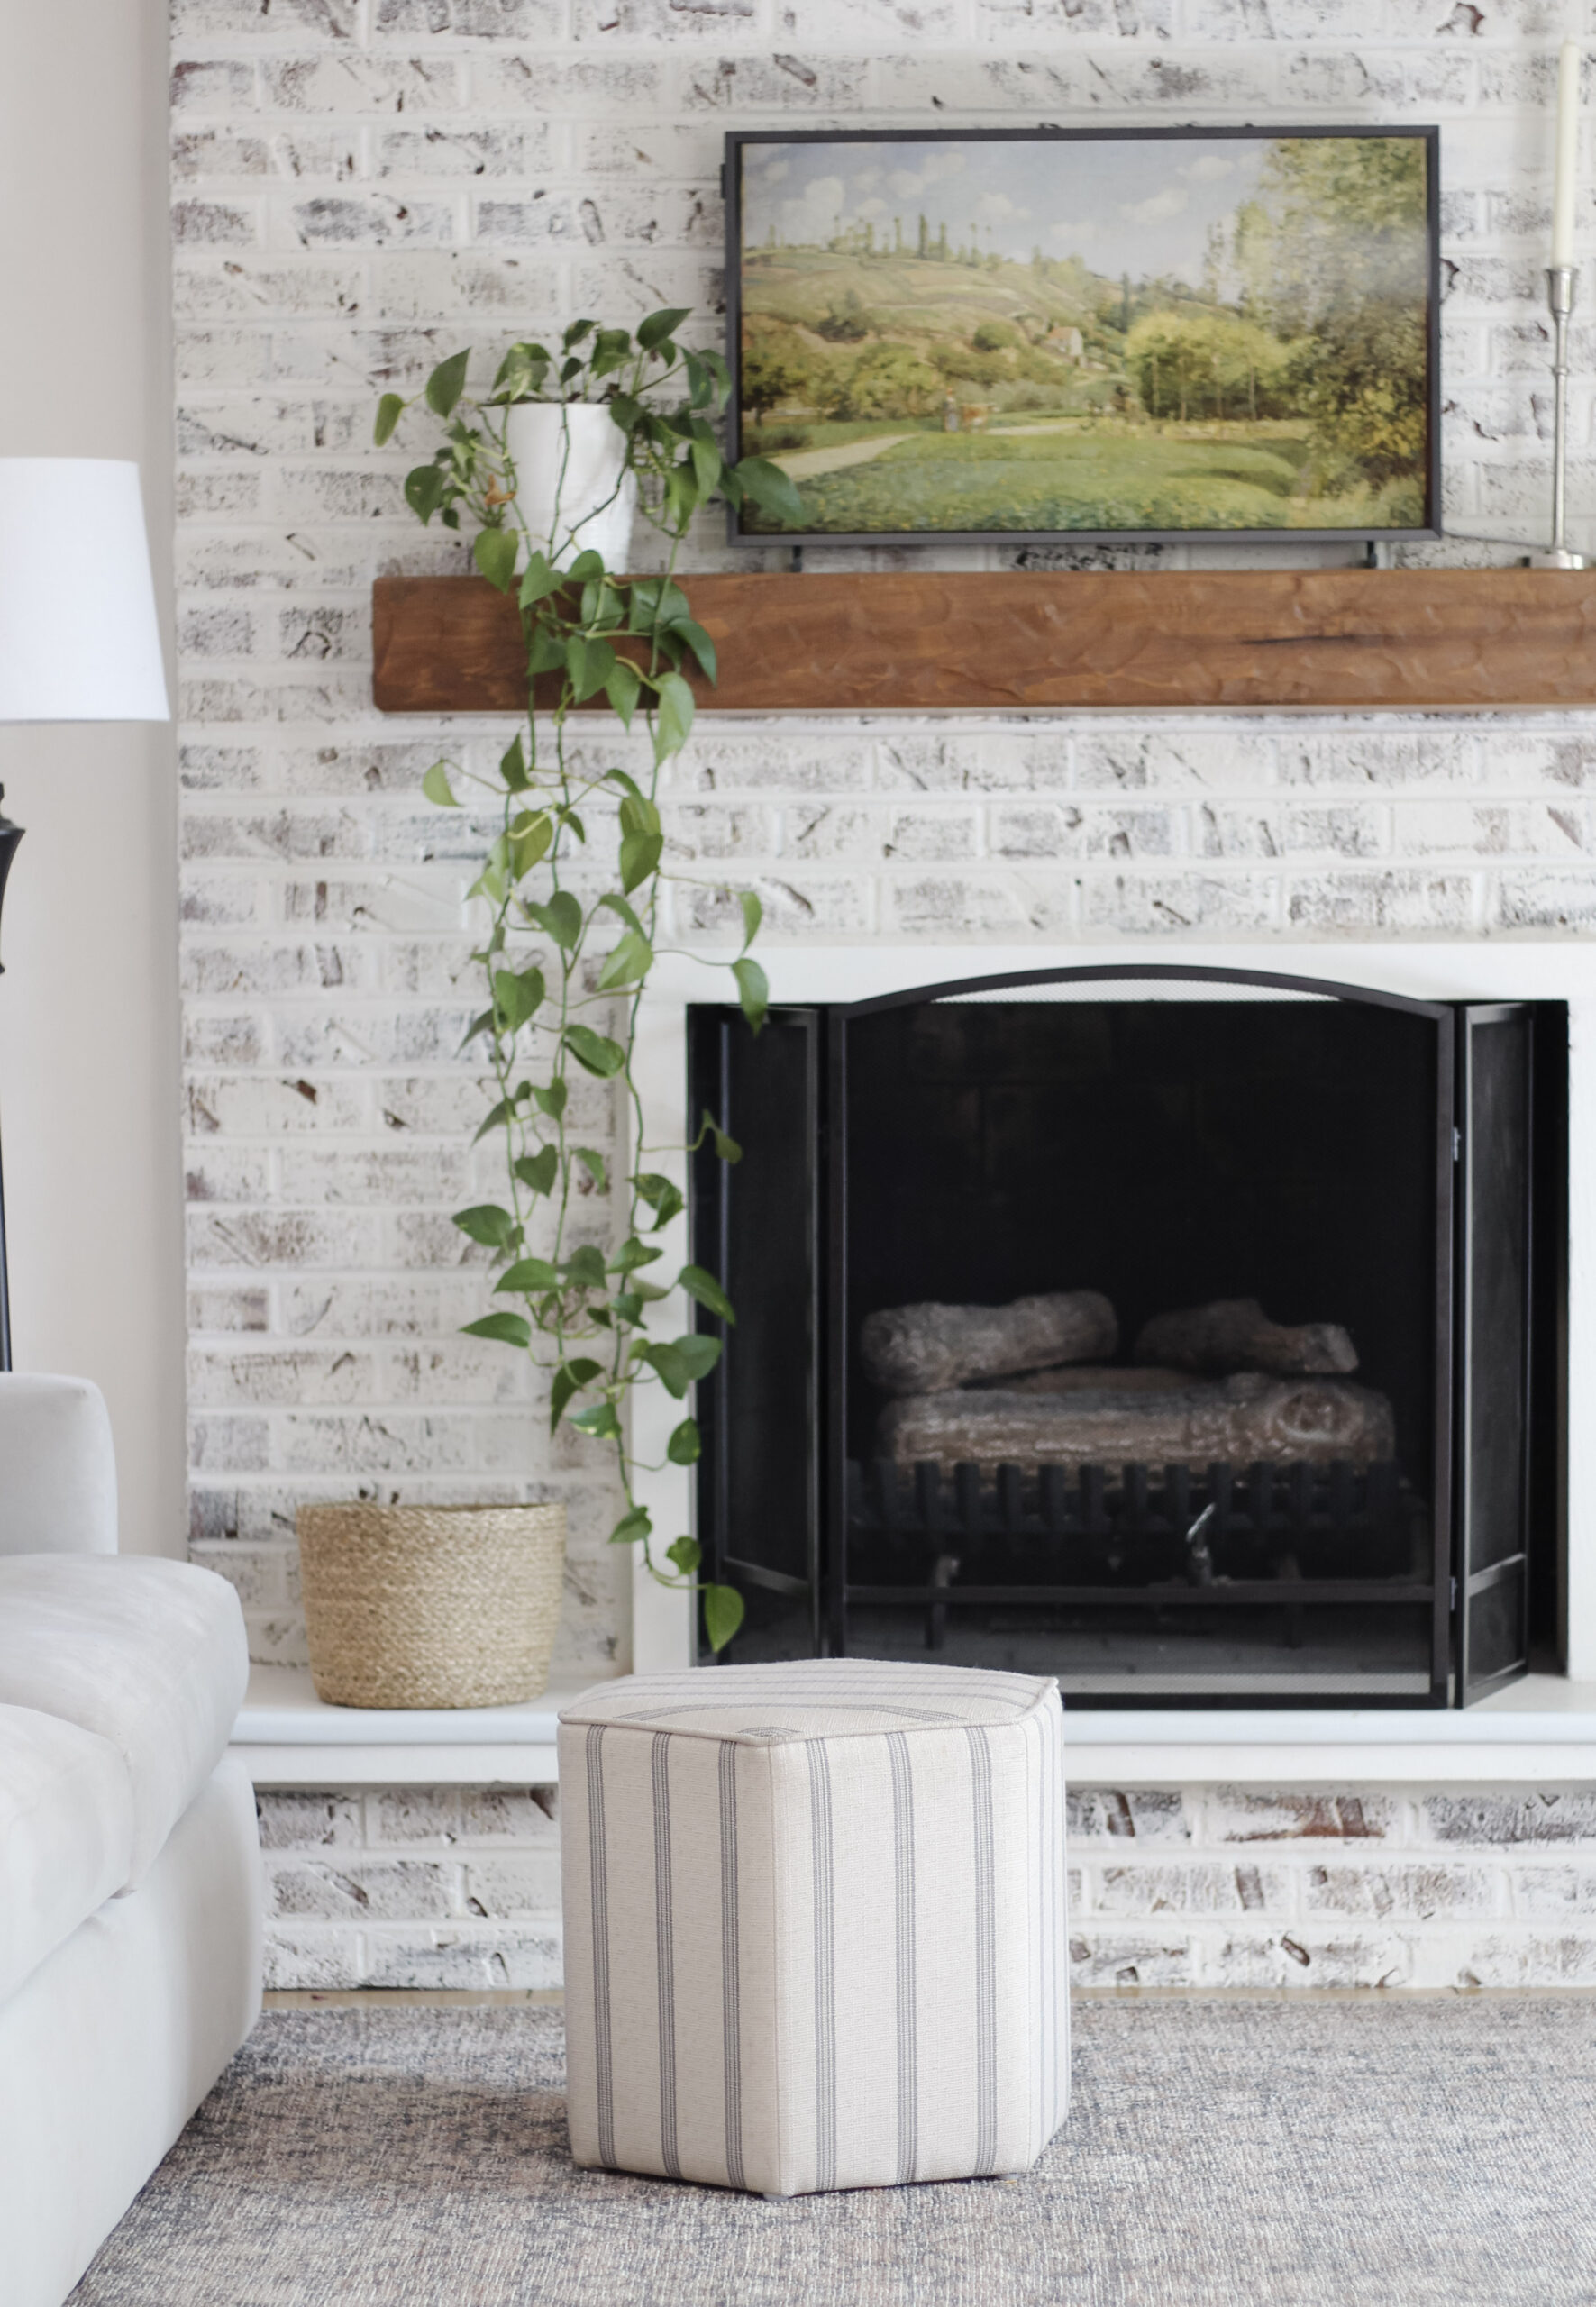
The transformation was so significant in the space that it’s hard to believe that this is the same room.
My biggest concern was what to do about the three cement ledges jutting out…I knew I wanted a flat surface for a more modern, classic look and I thought that we might have to build out the fireplace exterior to create a uniform surface.
Thankfully, the mason we hired to help us with the project explained that it was possible to simply chisel out the cement ledges and fill them with brick!
Perfect.
The only caveat was that it was going to be pretty impossible to match the brick perfectly — including the textured surface.
I wanted to paint the fireplace anyway, so I wasn’t really concerned about the color of the brick not matching—and the texture difference ended up not mattering either. If you look closely, you’ll be able to see a difference in texture, but since there’s always going to be some piece of art or a tv or mirror in the spot above the mantel, that differentiation truly doesn’t matter!
Read on for a breakdown of the steps involved and the total cost of the project:
Step 1: Removing the Cement Ledges
Jackhammer in tow, he tackled the ledges and replaced the empty cavities with 11 bricks. This was a very dusty and loud process, and we left the house for this! It took him about 4 hours total and gave us the uniform surface we were looking for, ready for the transformation ahead.
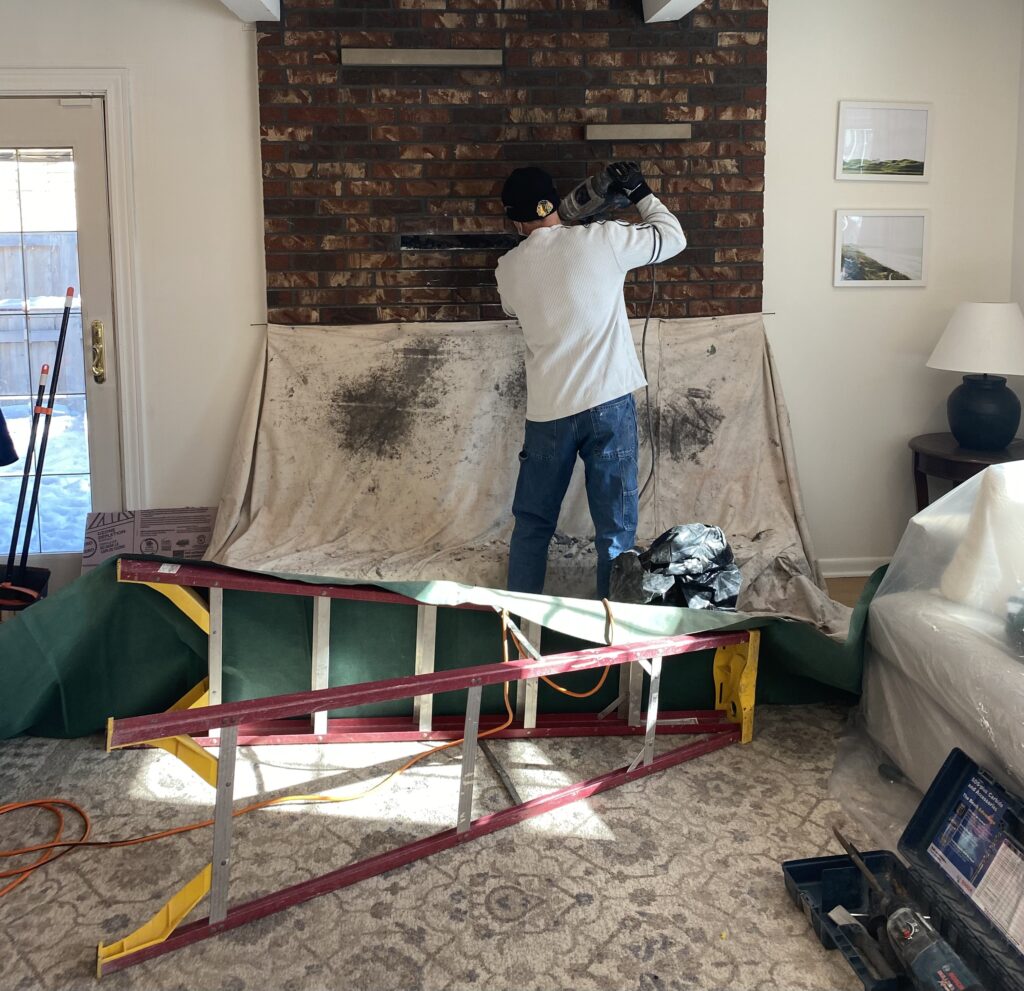
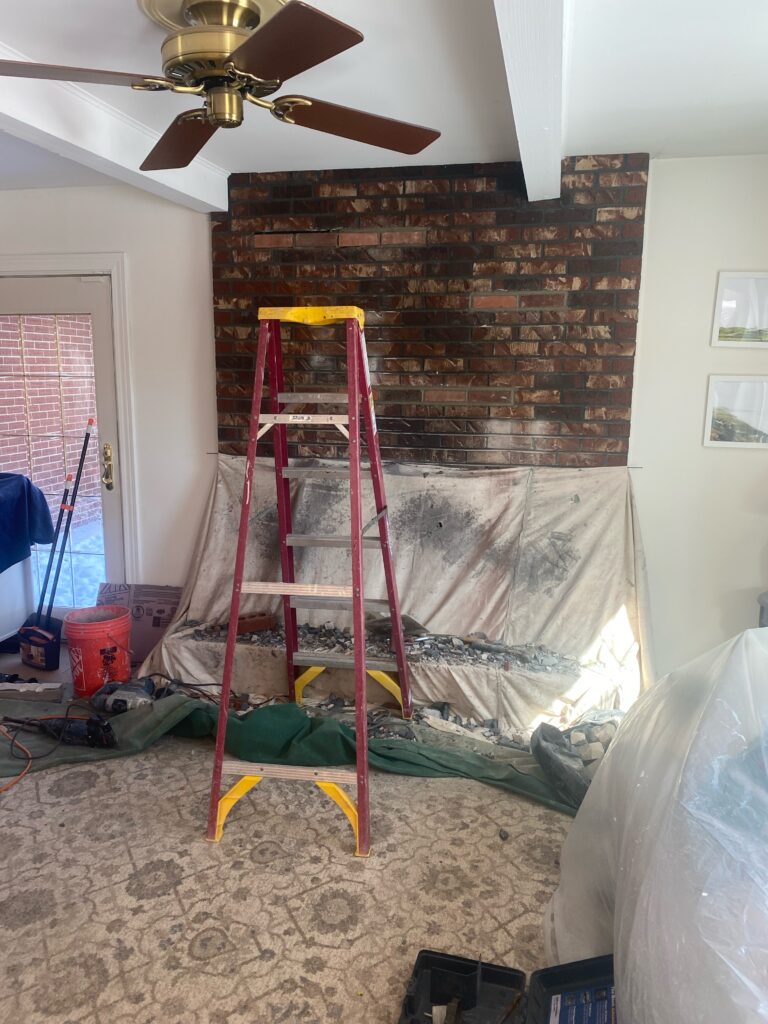
cement ledges removed, bricks filled in
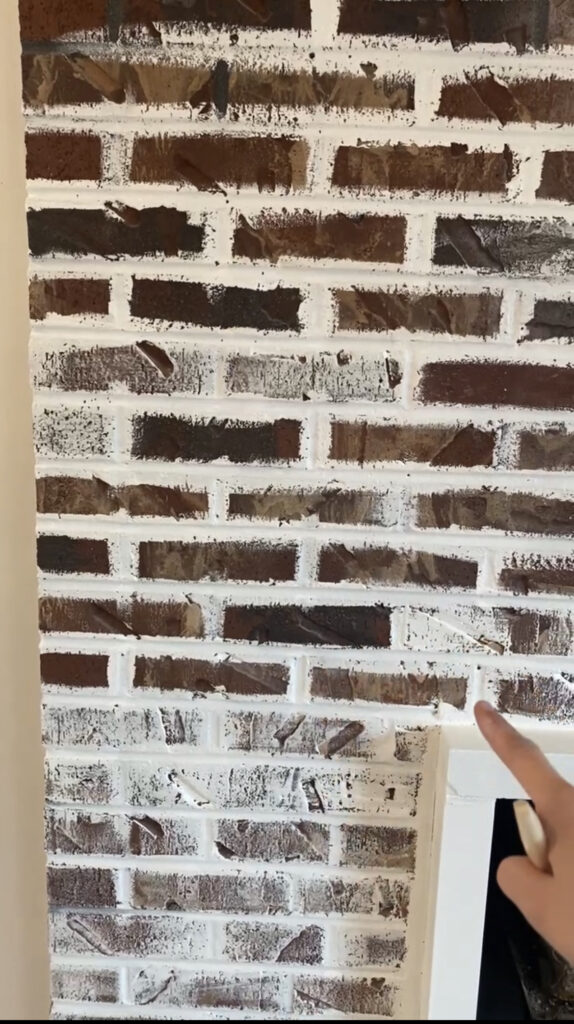
Step 2: Painting the Grout Lines
We waited a day for the mortar to dry and then started the next step by painting the fireplace using Benjamin Moore’s White Dove, eggshell finish. I chose this because our trim was White Dove (semigloss). Beginning with the grout lines, we applied the paint to ensure even coverage and a clean finish. This step served as a foundation for the subsequent layering techniques.
Step 3: A First Layer of Paint
I love old homes and vintage pieces and often find myself drawn to cozy, cottage design, so my goal with the fireplace makeover was to achieve a “cottage-inspired look”. Once the grout lines were finished, we took to painting the surface of the brick. We achieved this look by lightly dragging the paintbrush a cross the surface of the brick, intentionally leaving portions of the original brick color exposed.
I do think this method added depth and character to the fireplace, giving it a more distinctive and unique appearance versus painting it solid white. Below is what the fireplace looked like after the first coat of paint.
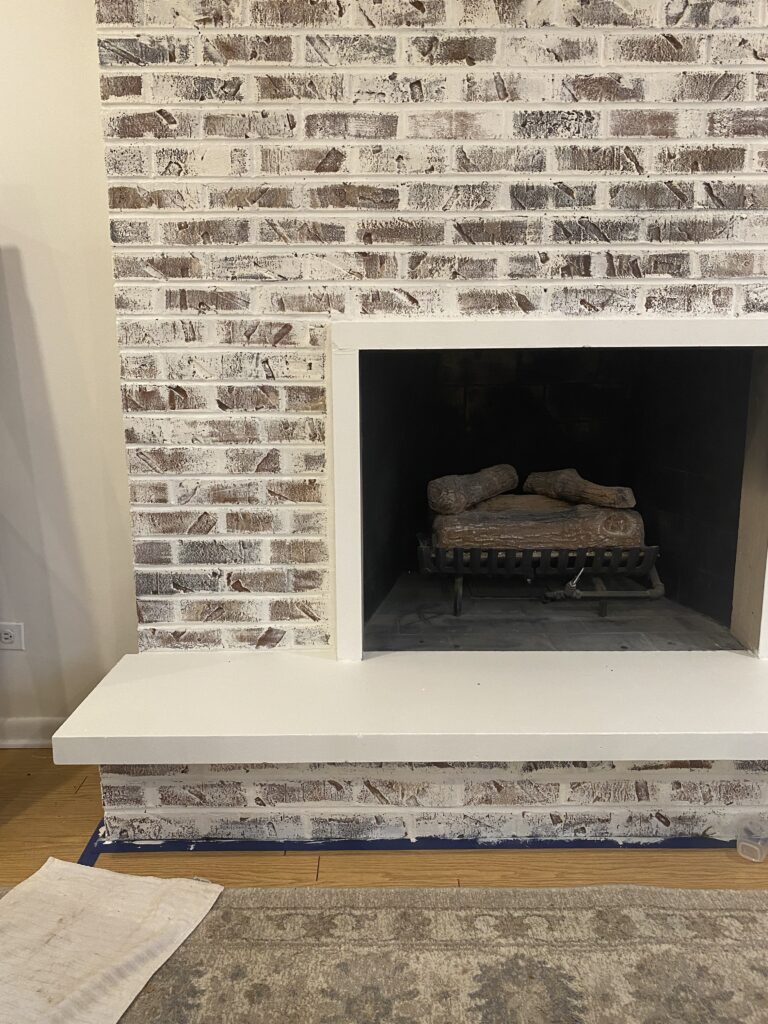
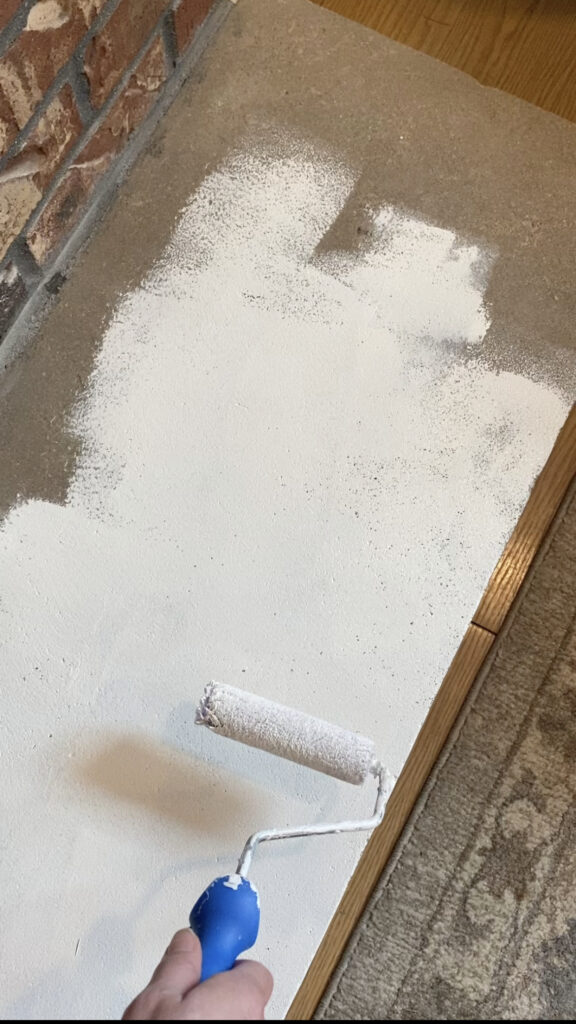
Step 4: A Second Layer of Paint
We found Benjamin Moore’s White Dove provided an excellent base—however, the white was feeling a bit stark to me after the first layer. So to warm it up a bit, we added a second paint layer using Benjamin Moore’s White Duck (which has a touch of beige/griege in it). This combination helped us achieve the desired modern and bright look (without the white feeling too stark!).
Step 5: Installing a New Mantel
To complete our fireplace makeover, we installed a new mantel.
I wanted to add a wood tone in to warm up the exterior and complement the new aesthetic we had created. After going down a rabbit hole of mantel options (who knew there were so many different mantel sizes and lengths?!?), I finally found THE ONE at Home Depot—it was made to order.
I went with a 60″ long beam at 6″ wide (the 9″ depth I felt would stick out too far!). Our fireplace was 77″ wide, and I didn’t want the beam to span the full length, but I did want it long enough to have decor on top in addition to a Samsung Frame TV in the center. I am really happy with the wood tone, length and quality of this piece! The beam was made to look aged/reclaimed, but didn’t cost me as much as an actual reclaimed beam would cost. Our mason came out to install this item for us when it came in and voila!
Project completed. We love this space and since it’s right off the kitchen, we use it all.the.time.
Cost Breakdown:
Masonry Work: $800 – for initial brick replacement
Mantel: $195
Paint: $30
Beam Install: $80
Total: $1,105
We still have yet to have our Frame TV mounted onto the brick above…but that’s a project for another day!